Replacing your far-flung garage door can initially seem like a daunting task; however, with the right guidance, it’s a sincere approach that anyone can deal with. Whether your ways off is misplaced, broken, or in truth previous, knowing the stairs to replace it is going to not most effectively beautify your home’s comfort but additionally beautify its safety. In this whole manual, we’ll walk you through the top 10 clean steps to replace your storage door some distance flung like a seasoned.
Understanding Your Garage Door System
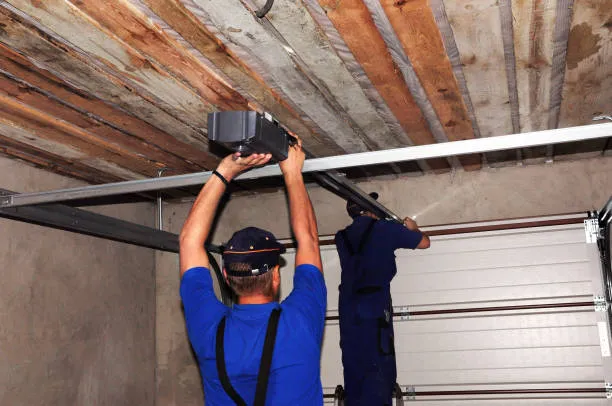
Before diving into the substitute system, it’s crucial to understand how your storage door device works. Most garage doors perform via a motorized tool that communicates at the side of your long-way flung control through radio frequency. Familiarizing yourself with the vital trouble additives will assist in streamlining the bogus method:
- Garage Door Opener: This is the principal motor that operates the door. It’s usually set up on the ceiling of your garage.
- Remote Control: The handheld device used to open and close the storage door from a distance.
- Safety Features: Modern garage doors come geared up with safety sensors that prevent the door from closing on boundaries, ensuring consumer safety.
- Wall Control Panel: This is a hard and speedy panel in your garage that also can manage your storage door.
Understanding these additives will make the substitute approach a lot less tough and extra green.
Step 1: Identify the Type of Remote
The first step in changing your storage door far off is identifying the type you need. There are several distinct varieties of storage door remotes:
- Universal Remotes: These can work with a couple of manufacturers and fashions, making them a flexible desire.
- Brand-Specific Remotes: Designed especially for exceptional manufacturers, these remotes make sure of compatibility together with your garage door opener.
Check your storage door opener’s guide or the model number at the opener itself to determine the satisfactory far-off you want.
Step 2: Purchase the Right Replacement Remote
Once the sort of faraway is required, it’s time to buy an alternative. You can discover garage door remotes in numerous locations:
- Local Hardware Stores: Many supply famous manufacturers and fashions.
- Online Retailers: Websites like Amazon or the manufacturer’s net site regularly provide a much wider preference.
- Home Improvement Stores: Large chains usually have numerous options, together with acquainted remotes.
When buying, ensure that the long-way-flung is like-minded alongside your particular storage door version. Reading critiques and checking product specs will let you make an informed preference.
Step 3: Gather Your Tools
Before you start the possibility technique, collect the essential equipment. You will want
- Screwdriver: To open the long-way flung casing, a Phillips or flat-head screwdriver can be required.
- Fresh Batteries: Ensure you have got new batteries for the far off.
- User Manual: This will offer unique commands related to your model and programming steps.
Having those gadgets geared up will make the approach smoother and faster.
Step 4: Open the Remote Control
To start the unreal system, you’ll want to open the casing of your new, far-flung:
- Locate the Screws: Use your screwdriver to cast off the screws positioned at the lower back or bottom of the far-off.
- Separate the casing: Carefully pry open the casing to access the internal additives.
Take care at some unspecified time in the future of this step to keep away from awful components or losing small additives.
Step 5: Insert the Batteries
With the airway flung open, it’s time to insert the sparkling batteries:
- Check the Battery Orientation: Ensure that you place the batteries inside the nice path, following the markings inside the far-flung.
- Close the Casing: Once the batteries are in vicinity, snap or screw the casing lower again collectively securely.
Using clean batteries is vital for the long way off to function efficaciously.
Step 6: Program Your New Remote
Programming your new garage door a ways off is a critical step. Here’s a manner to do it:
- Locate the Learn Button: This button is generally positioned at the garage door opener unit, often on the returnr facet of the motor. It can be categorized as as “Learn,” “Program,” or “Smart.”
- Press the Learn Button: Press and keep the button until the indicator lightactivates. This usually takes a few seconds.
- Press the Remote Button: Within 30 seconds, press the button for your new far-flung,, which you need to software. The indicator lightmust blink and then turn off, signaling a ssuccessful program
Refer to your client manual for particular programming instructions, as they are capable of vvaryinwith the resource of model and emblem.
Step 7: Test the Remote
Once you have got got programmed your new awayoff, it’s time to test it:
- Open and Close the Garage Door: Press the button inatracted manner and and fling itlung to appearance if the door responds.
- Check the RangMove,ove,ove in addadditionlong way from the garage to ensfar-the far flung works from a distance. This will assist you in in affirmingirm that the programming turned into a fulfillment.
If the door doesn’t respond, repeat the programming steps to ensure everything is ready efficaciously.
Step 8: Troubleshoot Common Issues
If you stumble upon issues whilst trying out your new some distance off, bear in mind tfollowinowingnes troubleshooting tips:
- Check the Batterisure: Make fantastic the batteries are sparkling aand installed installedefficaciously installation. Sometimes, even new batteries may be defective, so it’sworth double-checking.
- Reprogram the Remote: Occasionally, reprogramming can clear up troubles that arie up at some point ofinhe preliminary setup.
- Examine the Garage Door Opener: Ensure the opener is plugged in and functioning. If the opener’s lighting fixtures aren’t workingere can be an electrical problem.
Addressing those commonplace issues can saveand frustration.
Step 9: Maintain Your Garage Door System
To save you future issues together along with your garage door far off, the ordinarynarynary safety of your storage door gadget is important. Here are a few guidelines:
- Regular Inspections: Periodically take a loofor anysr harm to the storage door and its components.
- Lubricate Moving Parts: Keep the tracks, rollers, and hinges lubricated with a primarily silicone-basedlr easy operation. This may even reduce noise and positionig on over time.
- Test Safety Features: Monthly trying out of safety sensors guarantees they’re functioning efficaciously. This is critical for the safety of people and pets.
Regular protection extends the lilifespansf your storage door toolsss and complements safety.
Step 10: Dispose of the Old Remote Properly
After efficaciously converting youfar-r-flung, it’s vital to take away the vintage one responsibly:
- Remove Batteries: Take out the batteries to save you any ability leakage or environmental harm.
- Recycle the Remote: Check in case your community recycling middle accepts virtual gadgets. Many electronics may be recycled to decrease waste.
Proper disposal not onlyyyhelpst also continukeepsrivate home steady from capacity risks.
Conclusion
Replacing your garage door a long way off doesn’t want to be a hassle. By following those ten easy steps, you may deal with the system like a pro. Remember, the key to maintaining a practical garage door device lies in statstatistics,, components, following right methods, and wearing out normal safety.
Call to Action
Are you prepared to update your garagdoor,,ays flung nowadays? Follow our manual and experience the benefit and security of a functioning garage door. If you havany questions or want additional assistancencfeel freestened to attain reachus! Your domestic deserves the fine almost about safety and convenience.