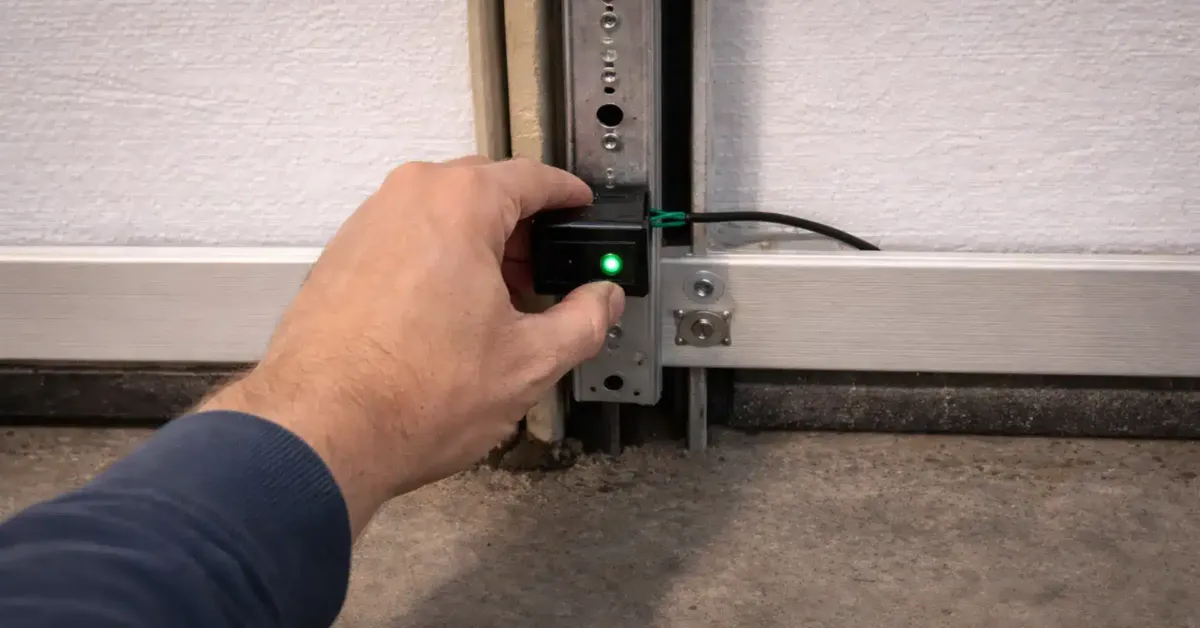
Garage door safety sensors are a small part of your garage door system, but they play a major role in keeping people, pets, and property safe. When the sensors are out of position, the door may refuse to close, reverse after touching the floor, or flash warning lights. In many cases, you do not need a new sensor or a service call. A simple garage door safety sensor alignment can solve the problem in about 10 minutes.
This guide explains how to align garage door sensors safely and correctly. You will learn how to identify misalignment, adjust the sensors, test the system, and handle common garage door sensor alignment issues. If the problem continues after these steps, Apex Garage Doors LLC can help identify the cause and repair the system.
What Are Garage Door Safety Sensors?
Garage door safety sensors are photo eye sensors installed near the bottom of both sides of the garage door. One sensor sends an invisible infrared beam toward the other sensor. When the beam is clear, the garage door opener knows it is safe to close. If something blocks the beam, the opener should stop or reverse the door.
The sensors must face each other at nearly the same height and angle. Even a small change in garage door sensor positioning can interrupt the beam. Dirt, vibration, loose brackets, accidental bumps, or changes in the garage floor can cause the garage sensors not aligned condition to appear. The result may be a garage door sensor problem that prevents normal operation.
Signs Your Garage Door Sensors Need Alignment
One of the clearest signs of a sensor issue is a garage door that won’t close. The opener may start the closing cycle and then immediately reverse. You may also notice that the garage door sensor light is blinking, off, or showing a different pattern on one sensor compared with the other. These signs often point to a blocked or misaligned sensor beam and may mean a garage door sensor adjustment is needed.
Another common warning is that the door works only when you hold the wall button down. You may also see that the garage door sensors are not working after someone bumps the sensor bracket. Before replacing anything, inspect both sensors and the area around them. Many garage door sensors troubleshooting problems are caused by simple positioning issues rather than failed equipment.
How to Align Garage Door Sensors in 10 Minutes
Step 1: Turn Off the Garage Door Opener
For safety, disconnect power to the garage door opener before adjusting the sensors. You do not need to remove the sensors from the wiring. Simply unplug the opener from the electrical outlet. This prevents the door from operating while your hands are near the sensor brackets.
Take a quick look at both sensors before making adjustments. Check whether they are loose, tilted, dirty, or sitting at different heights. If one sensor is clearly lower or angled away from the other, you have likely found the source of the problem.
Step 2: Clean Both Sensor Lenses
Dust and dirt can weaken or block the infrared beam. Use a clean, soft, dry cloth to gently wipe the lens on each garage door safety sensor. Avoid using harsh cleaners or spraying liquid directly onto the sensor.
After cleaning, inspect the lenses for cracks or visible damage. If the lenses are clean but the garage sensor light still does not respond correctly, continue with the garage door sensor adjustment. Cleaning alone will not correct a sensor that has been physically moved out of position.
Step 3: Check the Sensor Height
Place both sensors at roughly the same height from the garage floor. They should face each other directly across the garage door opening. A small difference in height can sometimes prevent the beam from reaching the receiving sensor.
If one sensor is loose, gently loosen its mounting screw or wing nut. Move the sensor until it matches the height and general position of the other sensor. Do not force the bracket because bending it can create a bigger garage door sensor alignment issue.
Step 4: Align the Sensors Face to Face
This is the main part of the garage door sensor adjustment guide. Look directly at both sensors and make sure they point toward each other rather than toward the wall, floor, or ceiling. Adjust one sensor at a time until both photo eyes have a clear line between them.
Many systems have indicator lights that help with garage door sensor positioning. Depending on the opener model, the lights may become steady when the sensors are properly aligned. If one light remains off or keeps blinking, make small adjustments until both sensors show the normal operating signal.
Step 5: Tighten the Brackets
Once the lights indicate proper alignment, carefully tighten the sensor brackets. Hold the sensor in place while tightening so it does not move. This step matters because a sensor that is correctly aligned but loosely mounted can move again because of vibration.
Do not overtighten the hardware. Excessive force can damage the bracket or change the sensor angle. A firm connection is enough to keep the sensors stable during normal garage door operation.
Step 6: Restore Power and Test the Door
Plug the garage door opener back into the outlet and use the remote or wall control to test the door. Watch the entire closing cycle. The door should move smoothly toward the floor without reversing because of a sensor signal problem.
You should also test the safety system. Place a suitable object in the sensor beam without putting your body under the moving door. The opener should detect the blocked beam and prevent the door from closing normally. If it does not, stop using the door and investigate the system further.
Common Garage Door Sensors Troubleshooting Problems
If the garage door sensors are not working after alignment, check the wiring next. Look for loose wires, damaged insulation, or wires pulled away from the sensor terminals. A damaged wire can create symptoms that look exactly like a positioning problem.
Also inspect the sensor brackets for bends or damage. If the sensors cannot stay aligned after you tighten them, the bracket may be worn or bent. If the indicator lights remain abnormal after cleaning, positioning, and wiring checks, the sensor itself may have failed. At that point, replacing the sensor or having a professional diagnose the opener is more practical than repeated adjustments.
How to Prevent Future Sensor Alignment Issues
Keep the area around the garage door sensors clear. Avoid storing boxes, tools, bicycles, or other items directly beside the sensors. Objects that hit the brackets can change their position and create another alignment problem.
It is also useful to inspect the sensors every few months. Wipe away dust and check that the brackets remain secure. If you notice repeated garage door sensor alignment problems, do not keep adjusting the sensors without finding the underlying cause. Excessive vibration, damaged mounting hardware, wiring problems, or an issue with the opener may need professional attention.
When to Call a Garage Door Professional
Basic sensor alignment is usually simple, but not every garage door sensor problem can be fixed by adjusting the photo eyes. If the indicator lights remain abnormal, the sensors have damaged wires, or the door still refuses to close after proper alignment, the opener may have an electrical or mechanical fault.
A professional can test the sensor circuit, wiring, brackets, and opener controls instead of replacing parts without confirming the cause. Apex Garage Doors LLC can help when basic garage door sensor troubleshooting does not resolve the issue. This approach can prevent unnecessary part replacement and help restore safe operation.
Frequently Asked Questions
How do I know if my garage door sensors are misaligned?
Check the indicator lights on both sensors and compare their position. If one light is off or blinking when the other shows normal operation, the sensors may not be facing each other correctly. A garage door that starts closing and immediately reverses is another common sign.
How far should garage door sensors be from the floor?
Most garage door photo eye sensors are installed close to the bottom of the door tracks, commonly around six inches above the floor. The exact installation can vary by opener and manufacturer, so match the existing installation position when making adjustments.
Why is one garage door sensor light blinking?
A blinking light can indicate that the sensor is not receiving the infrared beam correctly. Clean both lenses, check their height, and make sure they face each other directly. If the light continues blinking after alignment, inspect the wiring and sensor brackets.
Can dirty sensors cause a garage door not to close?
Yes. Dust or dirt on the sensor lens can interfere with the infrared beam. Cleaning both lenses with a soft cloth is a simple first step when a garage door won’t close. If cleaning does not help, continue with sensor positioning and wiring checks.
What should I do if garage door sensor alignment does not fix the problem?
Check the wiring, mounting brackets, and indicator lights. If the sensors still do not work correctly, the problem may involve a damaged sensor, broken wire, or opener circuit. Contact a qualified garage door technician instead of bypassing the safety sensors.
Get Help With Garage Door Sensor Problems
If your garage door sensors remain out of alignment after these steps, do not bypass the safety system just to make the door operate. Proper sensor function is an important part of safe garage door operation. A trained technician can identify whether the problem comes from alignment, wiring, damaged hardware, or the opener itself.
For professional help with garage door safety sensor alignment, contact Apex Garage Doors LLC at (725) 232-5237. Their team can inspect the sensor system and help fix misaligned garage door sensors when a basic adjustment is not enough.